Gear Config
The Gear Config Pane will display the selected gear’s port details and has a button at the bottom of the pane to view all details.
Port Groups
GearConnect will automatically create port group labels based on all the port data, as defined in Gear Port Options. These port groups are then used to organize the ports in the Gear Config Pane and the full details table.
Ports are grouped by combining their properties:
- Category
- Block
- Connector
- Direction
- Signal type
- Signal flow
- Speed
- Is expansion port
- Expansion card model*
- Expansion card index*
These attributes are merged to create group names using this structure:
<Category> (<Connector><Signal Type><Direction>) – <Speed> Block <N>Additionally, when Group Expansion Ports is enabled, expansion ports will further be grouped using:
<Expansion Card Model> (<Expansion Card Index>)Any ports that do not have a value for a specific attribute will simply be omitted from the group name.
If the port belongs to a block, the block identifier is appended to the group name. For example:
- Network (RJ45) – 1 Gbps Block 1
If the connector is the same as the signal type (for example HDMI) then the connector will be omitted from the group name.
For example:
- Network (etherCON) – 1 Gbps
- Video (Mini BNC SDI Out)
Each port group header is colour-coded to match the port colour of the connector, making it easy to identify groups at a glance - the same colours appear on the ports in the drawing.
If you change any of the port options using something like Full Edit Mode (Pro feature), then the ports will be re-generated based on their new configuration. Because of this, you will see ports move around and change groups.
Expansion Cards
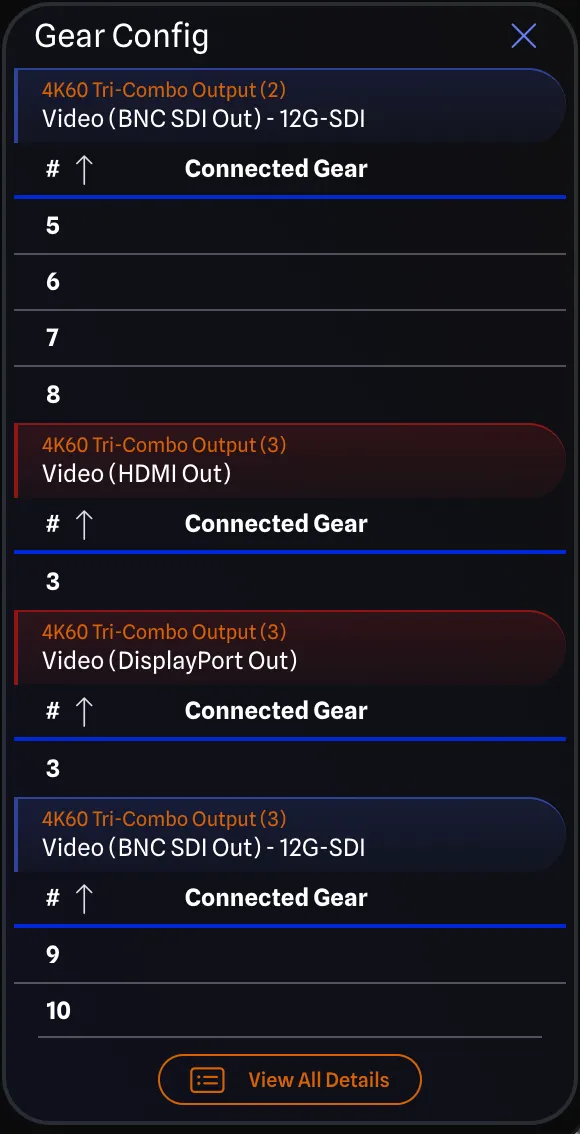
For Detail Mode gear that has expansion cards, and the gear item has Group Expansion Ports enabled, the ports will be sorted into expansion card tables at the bottom of the Gear Config Pane. This will group the ports by their expansion card, and then by their port group as described above.
For example, if you have an expansion card that has 4 HDMI ports and 4 DisplayPort ports, you will see two tables at the bottom of the Gear Config Pane. The expansion card header for both will show the card model and index (e.g., “4K60 Tri-Combo Output (1)”). Below that, the port group name (e.g., “Video (HDMI Out)”) is shown as normal.
The second table will have the same expansion card header but a different port group name (“Video (DisplayPort Out)”). This indicates that both of these tables are part of the same expansion card but have different port groups.
If Group Expansion Ports is disabled or the gear item does not have expansion cards, instead the ports will be grouped together, ignoring the expansion card details. In the above example, the 4 HDMI and 4 DisplayPort ports would join any other ports on the gear item or other expansion cards in one HDMI out and one DisplayPort out table.
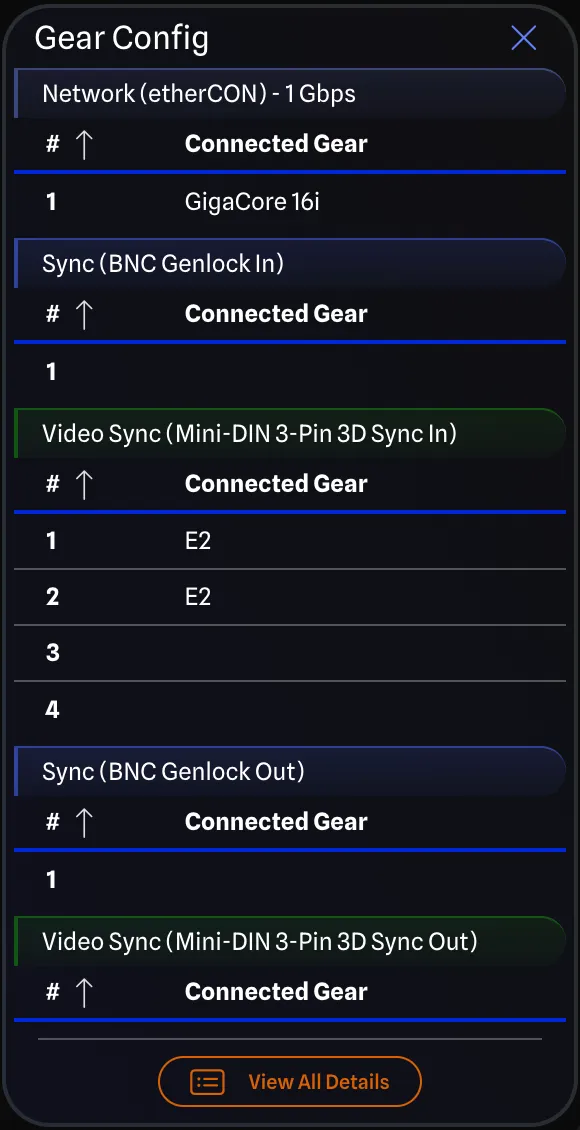
Compact Mode
When the port groups are shown in the Gear Config Pane, they are in compact mode. This just shows:
- Sort Order
- Connected Gear
You can edit the sort order by clicking on the number. This will sort the port within the port group so that all ports of the same type are together in the drawing. This is also why you will see each port group usually defaults to starting from 1 each time.
View All Details
By clicking on the View All Details button at the bottom of the pane, a dialog will open showing all the port details for the selected gear item, with further information about each port.

Gear Preview
A live preview of the selected gear item is displayed alongside the port tables. The preview updates in real-time as changes are made to ports, such as toggling visibility, reordering, or editing port options.
- For Detail Mode gear, the preview appears as a panel on the left side of the dialog.

- For Standard Mode gear, the preview appears as a strip across the top of the dialog.
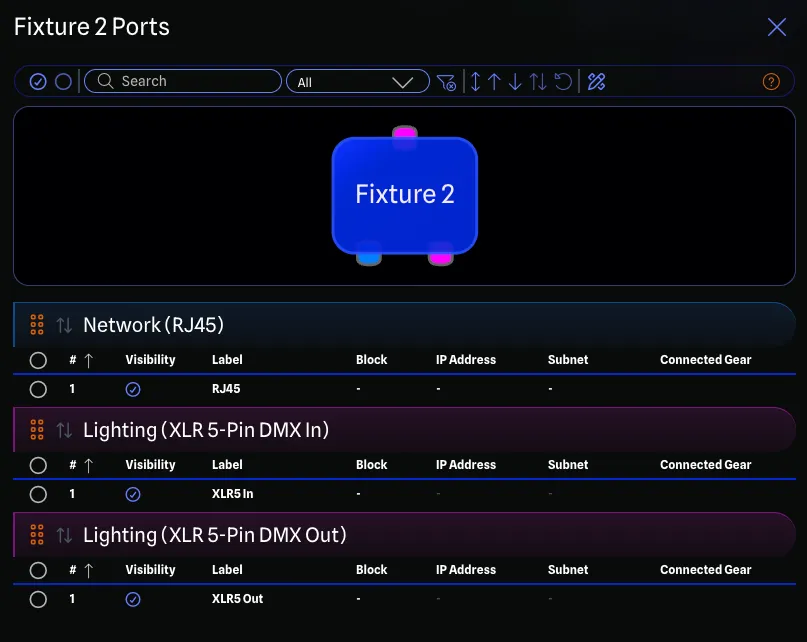
Information shown by default:
- Sort Order
- Visibility
- Label
- IP Address (network ports only, applicable to all gear except for Switches)
- Subnet (network ports only, applicable to all gear except for Switches)
- Connected Gear
Sort order and connected gear are the same as in when the tables are in compact mode.
Visibility is a toggle to show or hide the port in the drawing. This is useful for when you are done adding connections to a gear item and no longer need to see the rest of the ports.
Toolbar

There is a toolbar at the top of the dialog with the following options:
- Select All Ports: Selects all ports across all port tables.
- Deselect All Ports: Deselects all currently selected ports across all port tables.
- Search: Filter port groups by searching across group titles, expansion card names, and port labels.
- Category Filter: Filter the displayed ports by category using the dropdown.
- Connected Only: Toggle to show only ports that have active connections.
- Split All: Apply a Split side override to all port groups, splitting them evenly across both sides.
- Left/Top All: Force all port groups to the left side (Detail Mode) or top side (Standard Mode).
- Right/Bottom All: Force all port groups to the right side (Detail Mode) or bottom side (Standard Mode).
- Reset Side Overrides: Reset all side overrides back to Auto. Disabled when no overrides exist.
- Reset Port Group Ordering: Clear all custom group ordering values. Disabled when no custom ordering exists.
- Full Edit Mode: Will enable Full Edit Mode (Pro feature) to allow full editing abilities of all port options.
- Help (?): Opens a help dialog explaining port sorting and layout behaviour.
Port Group Controls

Each port group header in the table includes additional controls:
- Drag Handle: Drag a group header to reorder it relative to other groups in the table. This assigns custom group ordering values automatically.
- Side Override Cycling Button: Click to cycle through the available side override options (Auto → Split → Left/Right or Top/Bottom). See Side Overrides.
- Ordering Badge: Displays the current custom group order value, if one is set.
For details on side overrides and group ordering, see Port Sorting & Reordering.
Bulk Editing
You can edit multiple ports at once by selecting them using the checkbox column. When multiple ports are selected, editing a field on one selected port applies the change to all selected ports.
All editable fields in the table support bulk editing, including:
- Label
- IP Address
- Subnet Mask
- VLAN
- Visibility
- Port Options (when Full Edit Mode is enabled)
- Category
- Connector
- Direction
- Signal Type
- Signal Flow
- Speed
Full Edit Mode (Pro feature)
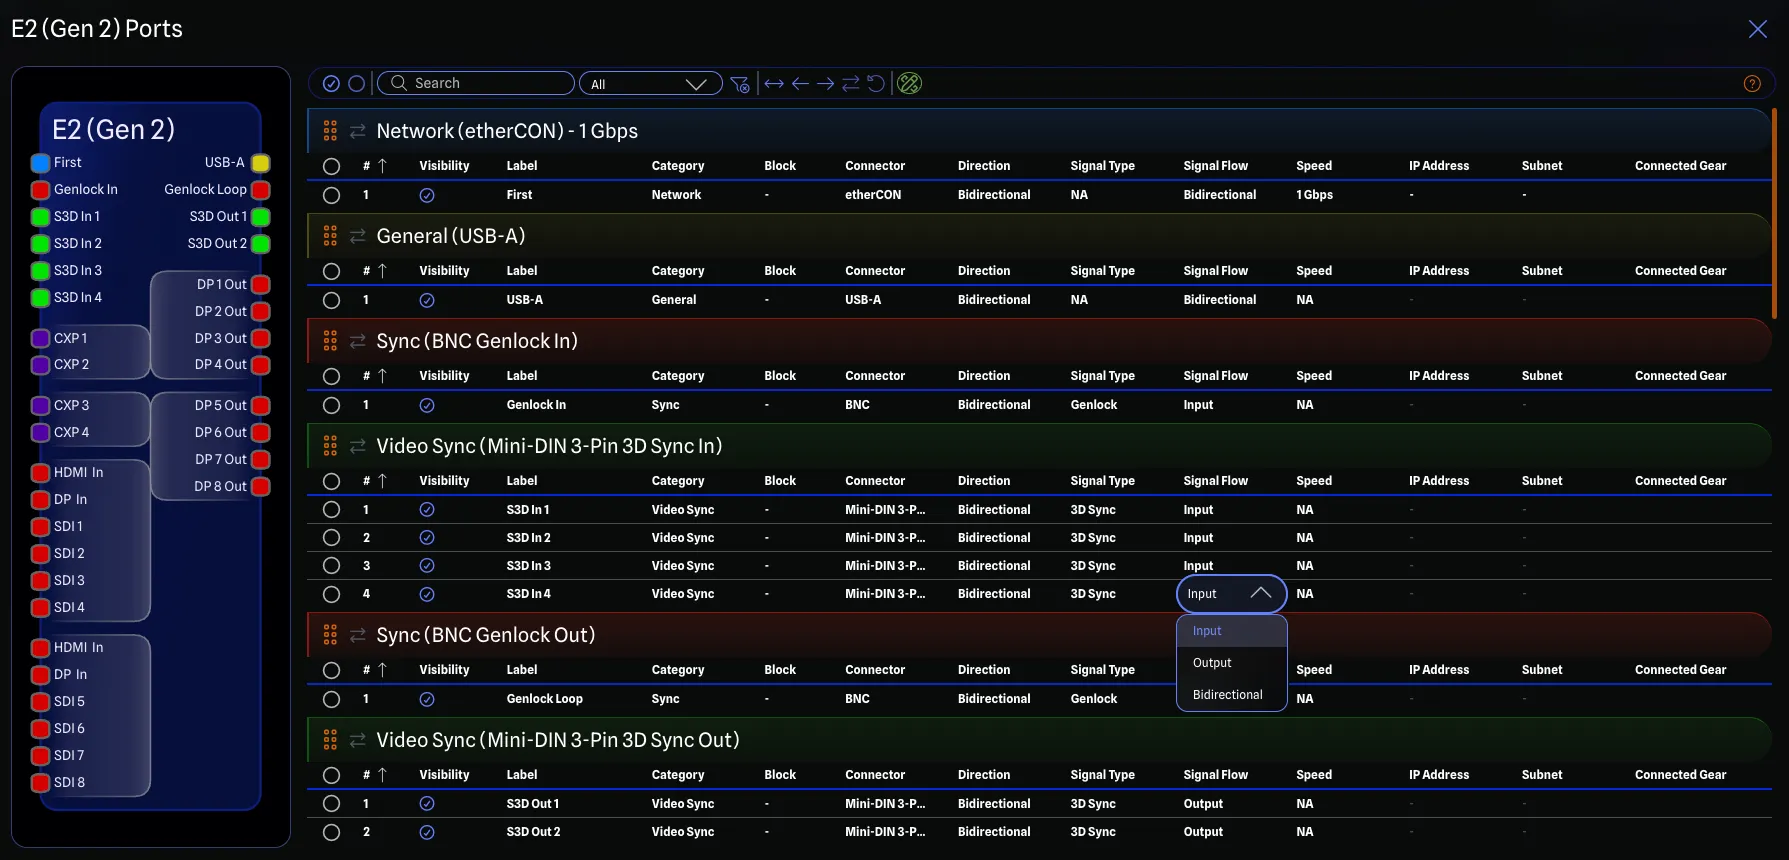
You can toggle Full Edit Mode by clicking on the Full Edit Mode button in the toolbar. This will allow you to edit all the port options for the selected gear item. When this mode is disabled, you will only see options that have configuration options, as defined in the library item, using Multi-Mode. You can learn more about Multi-Mode at Library Port Options and you can learn more about the various port options at Gear Port Options.
When selecting a Connector or Signal type, a categorized selector menu appears with search and keyboard navigation. See Using the Categorized Selector for details on how to use this menu.
If you edit any of the port options with an active connection, you will be prompted to remove the connection before you can save the changes. This is to ensure that you don’t accidentally change the port configuration to a connection that would not validate correctly.
Full Edit Mode will persist across all projects on the same device, so once you enable it in one project, it will be available in all other projects until you disable it.