User Settings
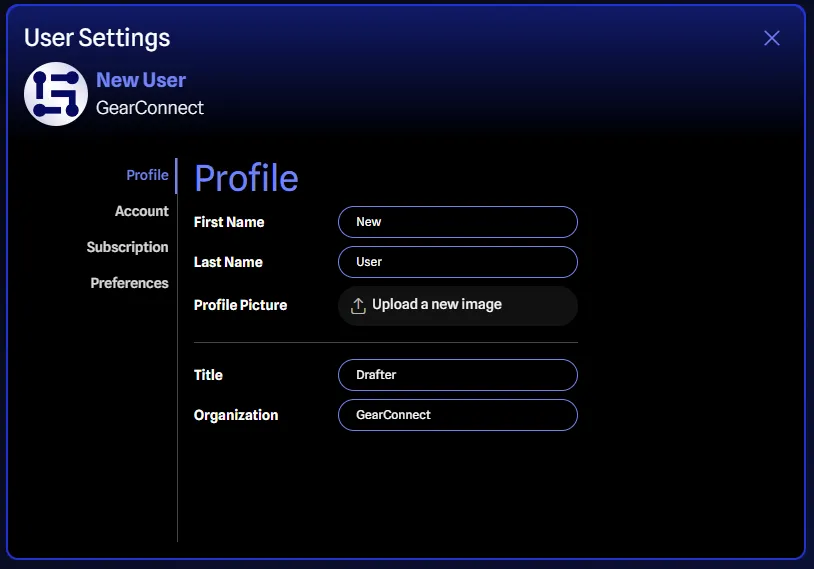
The User Settings dialog is accessible from all pages, once you are logged in. You can find it from the User Info menu which is located at the top right corner of the app.

You can manage your profile, account, subscription, and preferences from the User Settings dialog. These settings apply to your account, and not any specific project.
There are four tabs to the User Settings dialog:
- Profile
- Account
- Subscription
- Preferences
Profile
Under the Profile tab, you can find options for:
- First Name: Your first name.
- Last Name: Your last name.
- Profile Picture: You can upload a profile picture instead of the default avatar that is generated from your initials. Files must a valid image and under 3MB in size.
- Title: Your job title.
- Organization: The organization you are associated with.
Account
General
- Primary Email: Your primary email address. You can have several email addresses associated with your account, but the primary is the one used for notifications and logging in. You can manage your email addresses by clicking on the Manage Emails button. See the Manage Emails section below for more information.
- Email Verified: If your primary email address is verified, the checkmark will be checked. You need to verify your email address to be able to upgrade to a Pro subscription among other things.
- Google Connected: If you have connected your account to Google, the checkmark will be checked. This allows you to log in with Google in addition or instead of your email address and password. To manage your Google connection, click on the Manage Accounts button. See the Manage Accounts section below for more information.
Password
- Change Password: You will be taken to a new tab where you can change your password. You will need to enter your current password, then your new password, and confirm your new password. Once you have entered the information, click the Change Password button to save your changes.
- Reset Password: If you have forgotten your password, you can reset it by clicking the Reset Password button. Check your email for instructions for a link to reset your password.
Personal Data
- Request User Data: Requests your user data from us, which will draft an email for you in your default email client with all the information we require to process your request.
- Request User Deletion: Requests your user data to be deleted from our system, which will draft an email for you in your default email client with all the information we require to process your request.
Manage Emails
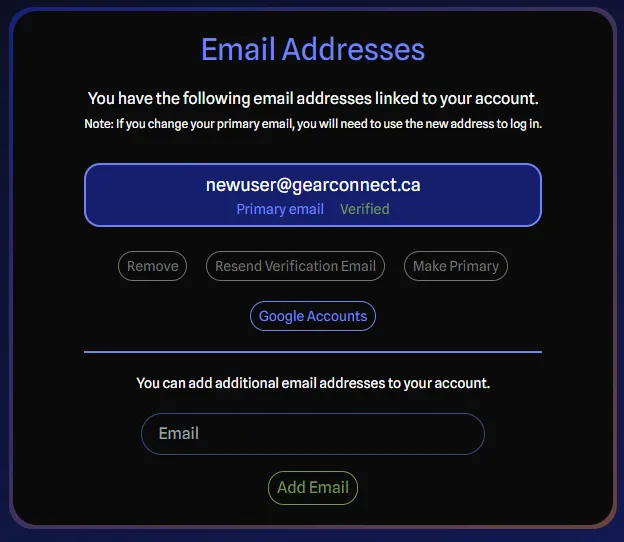
When you click on the Manage Emails button on the Profile tab, you will be taken to a new tab where you can view your different email addresses.

Each email displays the following information:
- Primary Email: If the email is your primary email address, it will show the text “Primary Email” underneath it.
- Verified: If the email address has been verified, it will show the text “Verified” underneath it. Otherwise it will show “Unverified”.
When you have an email selected, you have the following available options:
- Remove: Remove the selected email address from your account.
- Resend Verification Email: If the email address is unverified, you can resend the verification email.
- Make Primary: Make the selected email address the primary email address for your account.
Manage Accounts
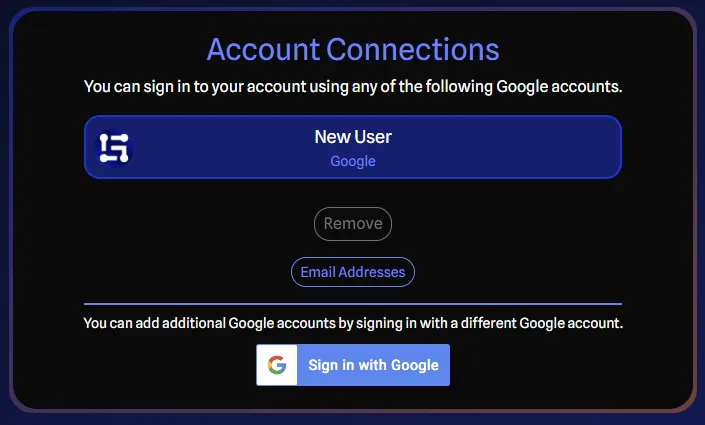
When you click on the Manage Accounts button on the Profile tab, you will be taken to a new tab where you can view your connected Google accounts.

You can have multiple Google accounts connected to your GearConnect account, all of which will allow you to log in with Google to the same account.
You can add a new Google account by clicking the Sign in with Google button and following the prompts. Once complete, you will then be able to log in with that Google account in addition to your email address and password.
You can remove a Google account by selecting the account you wish to remove and clicking the Remove button.
Subscription
Under the Subscription tab, you can find information about your current subscription, or a prompt to upgrade if you are on the Starter plan.
Assuming you are either on a trial or an active subscription, you will see the following information:
- Current Plan: The name of your current plan (Pro). You can manage your subscription by clicking the Manage Plan button. This will take you to our payment processor, Stripe where you can manage your subscription.
- Renewal Schedule: The occurrence of your subscription renewal. This will be either monthly or yearly. If it's monthly, you will see a button that says Upgrade to Yearly.
Depending on your subscription status, you will then see one of the following:
- Trial Ends: If you are on a trial, you will see the date your trial ends and will change to an active subscription. This is the day you will be charged for your subscription.
- Renews On: If you are on an active subscription, you will see the date your subscription renews. This is the day you will be charged for your subscription.
- Valid Until: If you have canceled your subscription, you will see the date your subscription is valid until.
Promotions
You can apply promotions to a monthly plan from the Stripe checkout page by entering the promotion code in the Promotion Code field. In some cases, promotion codes may automatically be applied for you when signing up, if you are signing up during a promotion period.
If you have an existing subscription, you can add a promotion code from this section in User Settings. You will see a field called Promo Code where you can enter the promotion code. Clicking the Apply Promo Code button will apply the promotion to your subscription if it is valid.
If you have an existing promotion applied, you will see the following fields in addition to the Promo Code field:
- Active Promo: The name of the promotion currently applied to your subscription.
- Promo Details: The details of the promotion currently applied to your subscription which includes the percentage discount and the date the promotion ends. For example: "50% until June 15th, 2027".
Actions
Under the actions section, you will have a button that says Cancel Plan. Clicking this button will take you to Stripe to confirm your cancellation.
If you are currently on a canceled plan but still within the grace period, you will see a button that says Renew Plan instead, which will take you to Stripe to re-activate your subscription.
Preferences
Under the Preferences tab, you can change settings for how your account behaves in GearConnect. You will see the following options:
- Theme: You can choose between Automatic (default), Light, and Dark themes.
Experimental Features
There is a section for Experimental Features which allows you to enable or disable features that are still in development. These features may not be fully functional or may have bugs. You can configure these features using the corresponding control (dropdown or toggle) next to the feature name.
- Local Mode: Enables Local Mode for your projects,
which saves data locally first for improved performance. You can choose the
sync behavior:
- Sync Periodically: Automatically syncs changes to the server every 10 minutes.
- Sync Manually: Only syncs changes when you manually trigger a sync.
- Force Offline Mode: Allows you to manually enable Offline Mode even when an internet connection is detected. Requires Local Mode to be enabled.
- Real Time Updates: Enables real-time updates for your projects. This will update your project in real-time if the project is updated in another tab or browser. This feature is still in development and does not cover all use cases at this time.

